1问题描述. |; [% ]7 n, ?5 {! b; q' {1 E
使用微信小程序开发者工具制作顶部导航栏。
' {- g2 V8 j# T( w( y% y9 U
& B5 s4 u; o1 q2算法描述. h- Q# E* h9 l- p2 J8 S
 5 ]* T( ?5 d" X4 o
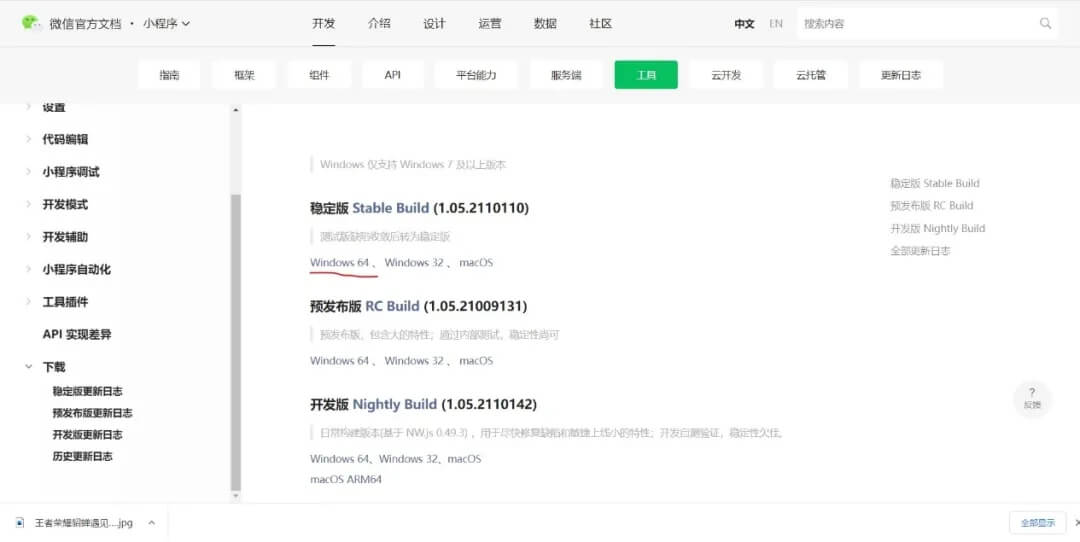
首先就是对微信小程序开发者工具的配置,官网搜索后进入,选择稳定版,Windows64位下载。
5 I4 Q' }% ~+ @/ u* Y/ o- S% M
 - y, J: H% H m% u- C
 7 R, B( r: a' f0 p# {$ f
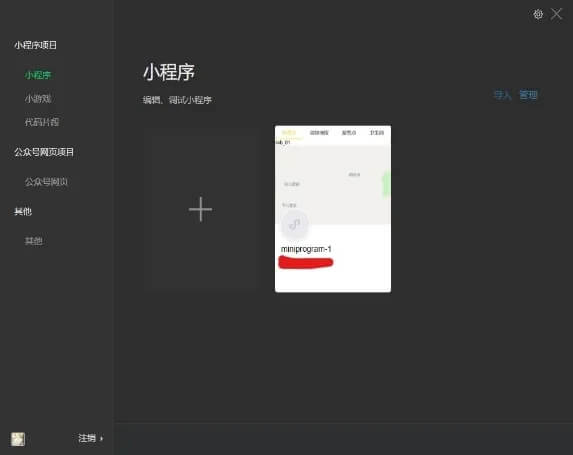
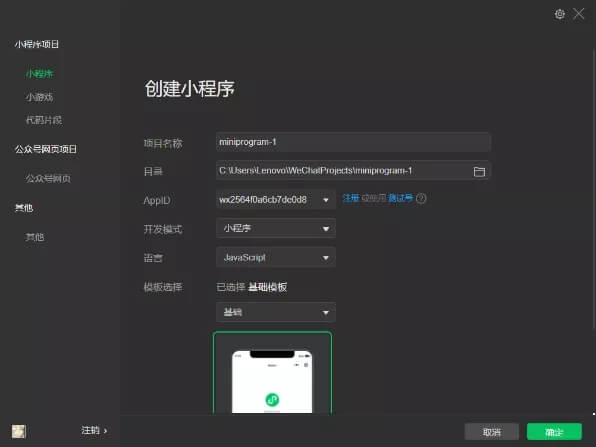
然后点开开发者工具,选择小程序,点击图片位置的加号,进入创建页面,可以更改项目名称和文件所在目录。
0 h/ c( b0 |9 Q Q- K 注意,在AppID中我们先选择使用测试号,然后点击确定
' L+ W- ], `0 e8 ~ 进入程序后,选择index.js文件,编辑data内容,再在index.wxml文件中加上文字页面,index.wxss文件中可以更改获取的图片信息。% t7 }! i5 V' V) S
要注意的是,最好不要直接在微信开发者工具中写代码,这里可以使用vscode,使用Java工具。
7 f1 S z) R* Z: x7 W0 t# t3 代码
! j0 I; \$ U& i. c: U: _+ z
5 }$ _/ y; H3 Y' o' U) G" W" Eindex.jx
var app = getApp()
Page({
data: {
navbar: ['科普点', '动物场馆', '游览点','卫生间'],
currentTab: 0
},
navbarTap: function(e){
this.setData({
currentTab: e.currentTarget.dataset.idx
})
}
})
index.wxml
<!--导航条-->
<view class="navbar">
<text wx:for="{{navbar}}" data-idx="{{index}}" class="item {{currentTab==index ? 'active' : ''}}" wx:key="unique" bindtap="navbarTap">{{item}}</text>
</view>
<!--科普点-->
<view hidden="{{currentTab!==0}}">
tab_01
</view>
<!--动物场馆-->
<view hidden="{{currentTab!==1}}">
tab_02
</view>
<!--游览点-->
<view hidden="{{currentTab!==2}}">
tab_03
</view>
index.wxss
page{
display: flex;
flex-direction: column;
height: 100%;
}
.navbar{
flex: none;
display: flex;
background: #fff;
}
.navbar .item{
position: relative;
flex: auto;
text-align: center;
line-height: 80rpx;
}
.navbar .item.active{
color: #FFCC00;
}
.navbar .item.active:after{
content: "";
display: block;
position: absolute;
bottom: 0;
left: 0;
right: 0;
height: 4rpx;
background: #FFCC00;
}
|  |手机版|小黑屋|paopaomj.COM
(
|手机版|小黑屋|paopaomj.COM
(  渝ICP备18007172号|
 渝公网安备50010502503914号 )



 发表于 2021-10-28 09:05:55